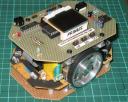
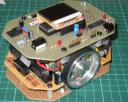
I finally have a primus mouse built and ready to test. All the bits are there and the processor runs up and can be programmed. Here are a few pictures to get you in the mood.By placing the components on three separate boards, each is relatively simple to build and test. Notice that everything is hand-wired on relatively easy to get perforated protoyping boards. The main board is double sided only to make it easy to mount the pin header connectors underneath.
The Nokia display works and there are three control buttons conveniently mounted just below it. underneath are the motor and sensor connectors. At the top are the serial connectors and the siz pin programming connector. The small stereo jack is for my convenient USB to TTL serial adaptor that is terminated with a 2.5mm stereo plug.
At the front, you can see the sensor assembly. Black card stops the detectors seeing the emitters directly and affords some shade from ambient lighting.The emitters need to be aligned and fixed in place with epoxy to stop them going out of alignment. this task would be better with some rigid holders to keep them in place but this will do for now. Also at the front is one of the two 6-cell AAA NiMh batteries.
At the rear are the motor drivers and the other battery pack. The batteries are wired together in series and can be unplugged for charching or when the mouse is in transit to prevent shorts. Not the sharpest picture in the bunch but you get the idea.


