The 12th Annual Micromouse Conference, MINOS12 was held on April 14th, 2012 at Royal Holloway College. Here are the highlights and papers from a packed days presentations.
DIY Encoders for FatCat
Tim Foden
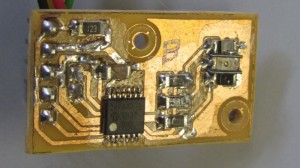
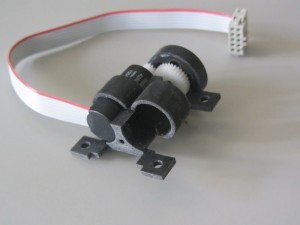
In common with many mouse builders, Tim is not impressed with the cost of Faulhaber motors. Other than their undoubted build quality and efficiency, they are usually chosen because they come with excellent encoders, making it easy to build a drive train with high resolution and minimal mechanical skill. Tim started with motors that had no encoders and set about building his own. His presentation at Minos told the story of their development. Along the way, he described several less than satisfactory solutions and explained why they were difficult or otherwise unsuitable. In so doing, he has saved us all a lot of trouble. Tim’s final solution (so far) is to use a simple scheme whereby reflective sensors and a relatively coarse pattern give a pair of quadrature waveforms that can be sampled at a high rate to resolve the angular position of the wheel. This is the same scheme used by the magnetic sensors in the AustriaMicroSystems AS5040 encoders and it has appeared on a small number of mice from Japan. In use it is clearly reliable and more than accurate enough for the task. Tim is getting excellent performance from his mouse.
Slides: MINOS12a-FatCat-DIY-Wheel-Encoders-Tim-Foden.ppt
Surface Mount Technology for Schools
Bernard Grabowski
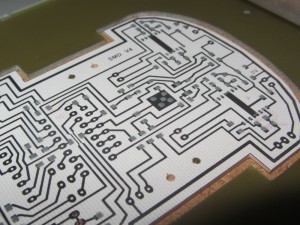
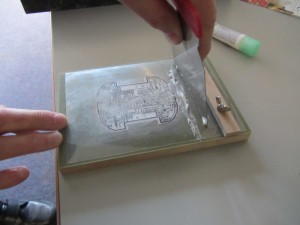
Along with Duncan Louttit, Bernard has been running a successful after-school robotics club for several years. Until recently, all electronic assembly had been with tradition through-hole techniques. Hand soldering though, is a skill that takes practice and time to master. It is a slow and cumbersome task that not many enjoyed. Recently, they decided to look at Surface Mount Technology and examined the pros and cons. In almost every regard, SMT was going to be better. The only real stumbling block was going to be the acquisition of a reflow oven. Then Bernard came across a pizza oven on eBay for a good price and everything came together. One notable issue that can give problems when using reflow is the accurate and repeatable application of solder paste. Remember that they need to build several boards of the same design. Stencils are the obvious choice but they can be expensive to have made so they came up with a typically ingenious method to make a solder paste applicator for low-volume runs out of OHP acetate sheet and readily available hardware. The results are very impressive with students happy, faster production and fewer errors.
Bernard also described a multipurpose small robot platform that allows students to make a variety of simple devices from the same chassis and pluggable sensor modules.
Slides: MINOS12b-Surface-Mount-Technlogy-For-Schools-Bernard-Grabowski
Rapid Prototyping of Robot Parts
Martyn Pittuck
For many builders of robots, the mechanical construction can be the greatest challenge. Few households are likely to have more than basic hand tools and the skills needed to use ‘proper’ machine tools like lathes and milling machines are time consuming to learn. Not only that, the cost of buying decent machine tools is pretty high. Since a typical micromouse builder is not going to be making lots of things, they really need a way to crate mechanical parts with minimum investment of time and money. In recent years, there have been great advances in rapid prototyping. Several techniques exits and, for relatively modest cost, anyone can have a rapid prototyping machine – 3D printer – in their own home. However, hobby-level rapid prototypers are not as accurate as one might hope and they too need time and money to work well. While he was a student, Martyn considered all these issues and decided that, for the number of parts he would need, his time and money would be better spent on more traditional student pursuits so he sent off his designs to be made by a specialist company. The design work was needed in any case and it was much more sensible to send the files of to a company than to have to work out how to make it from a block of plastic. The company he chose was Shapeways although there are several others. The cost per part depends entirely upon the volume of material used and can work out very reasonable. You could have a very large number of parts made before you approached the cost of buying your own milling machine – even without the tooling. In his presentation, Martin describes some of the processes used and the materials available. I, for one, will be having my next motor mounts made for me.
Slides: MINOS12c-Rapid-Prototyping-Robot-Parts-Matryn-Pittuck.pptx
Laser Cutting Techniques for Robot Parts
Tony Wilcox
It seems that everyone has a laser cutter these days. Certainly, they are available in many schools. These are remarkably versatile devices capable of cutting a range of sheet materials. What is often missing though, is the detailed information on actually using the beast. It seems that this can only be won once you have a machine since they are all a little different and require specific settings. Tony has recently acquired such a machine at Birmingham City University and has quickly taken advantage of its ability to produce a variety of parts with high accuracy and repeatability. Principally, he and his team have been making chassis components for small robots. His presentation focuses on the design and development of a line follower robot almost entirely laser cut from acrylic sheet. The slides contain a wealth of tips and information about making such devices. The wheels are a layered structure built up from sheets of acrylic. Even the gears have been cut on the machine. Not only does this mean that the only additional hardware required is quite minimal – a few screws, nuts and o-rings – but also that the design files can by given to anyone else with a laser cutter to make their own.
Slides: MINOS12d-LaserCutLineFollower-Tony-Wilcox.ppt
Laser Cut Schools Robots
David Hannaford
Like Bernard and Duncan, David has been helping out with after schools clubs near him as a STEM (Science Technology, Engineering and Mathematics) ambassador part of the STEM initiative. Electronics and Robotics are popular subjects and David has been working with Tony to put some of the laser cut parts into use in these clubs. David talked about the development of a simple but clever design for a wall following robot which could be developed by school students over a few weeks and makes use of laser cut parts and a range of very inexpensive and readily available parts to produce a useful robot on a small budget. He also related his experience in building and using the line follower robot chassis described by Tony Wilcox. This has proven to be a versatile and robust chassis that was quite easy to build. It was noted though that youngsters may not have the dexterity and skills that one might have hoped for when they had actual toys rather than electronic games. David estimates that it should be possible to assemble a good line following robot, with plenty of scope for simple and more complex work using this chassis, for well under £20 using easy to find components.
Slides: MINOS12e-Laser-Cut-Schools-Robots-David-Hannaford.pptx
The Third Dimension
Ken Hewitt
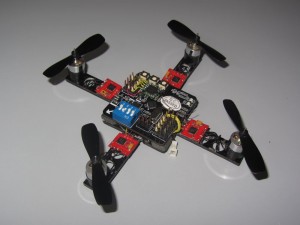
Aiming to be very topical, Ken had hoped to tell us about his initial experiences with the Raspberry Pi – the single board computer that can run Linux for under £30. Of course, that was back when everyone thought they could just order one and have it arrive. While products are now shipping, it is going to be a few months before supply can match demand. Not one to be content with just one project that everyone will be interested in, Ken has also been looking at quadrotor helicopters lately. Well, more than just looking at. He brought in two machines that he has been working on. Neither is yet ready to fly but both show great promise. The smallest of these would fit comfortably on a piece of A4 paper. It turns out that the parts needed to make these – including the inertial sensors and controllers – are now very easy to find and it is possible to build your own custom quadrotor from off-the shelf parts for quite reasonable sums of money. This puts quadrotor building in the same league as other model aircraft and makes the technology very accessible. Ken also showed us some great first person video (FPV) taken from a camera on board a quadrotor while the pilot flew using a pair of video goggles. Just make sure you don’t fly into the back of your own head.
Slides: MINOS12f-Te-Third-Dimension-Ken-Hewitt.pptx
Links:
- www.micronradiocontrol.co.uk
- www.arducopter.co.uk
- www.rcexplorer.se
- www.FPVhobby.co
- www.hobbyking.com
Open Source Tools for the STM32F4
Garry Bulmer
If there is a single microcontroller family that has excited everyone building small robots, it must be the ARM Cortex M3 – specifically the ST Micros STM32F1xx series. They have almost everything that you could want in a single microcontroller. Then they go and spoil it all by bringing out the STM32F4 series based on the Cortex M4 core. Now I would suggest that they do have everything you would need on a single device. Most notably, the STM32F4 adds more speed, more memory and fast floating point. There are a bunch of other things as well, which make it attractive for a very wide range of applications. In his presentation, Garry leads us through the highlights of the device comparing it with that other very popular controller, the Arduino. Now the Arduino is not a microcontroller, it is a package that uses an AVR processor and presents the user with a very easy to use and flexible control system. Similar such packages are available for the STM32 controllers – in particular the Leaflabs Maple project. Gary touches on this and describes a number of resources that allow the budding STM32 user to use free, open source tools to develop applications for the range of processors.
Slides: MINOS12g-STM32F4-and-open-source-Garry-Bulmer
Links:
- ARM GCC:
http://www.mentor.com/embedded-software/sourcery-tools/sourcery-codebench/editions/lite-edition/
Embedded development is ARM EABI. This supports all modern ARM processors, including Cortex-M/Rn/An, ARM-7, ARM-9, ARM-11 - General purpose C library:
http://sourceware.org/newlib/ - ST Micro STM32F4 Discovery development board:
http://www.st.com/internet/evalboard/product/252419.jsp
Documentation for the board is on ʻDesign Support” tab. - ST Micro STM32F4 Library:
http://www.st.com/internet/com/SOFTWARE_RESOURCES/SW_COMPONENT/FIRMWARE/stm32f4discovery_fw.zip - STM32F4 Documentation and Windows Tools on “Design Support” tab:
http://www.st.com/internet/mcu/product/252140.jsp
See the “Design Support”tab - ARM Cortex-M:
http://www.arm.com/products/processors/cortex-m/cortex-m4-processor.php - LeafLabs Maple IDE, includes GNU gcc:
http://leaflabs.com/docs/maple-ide-install.html
The Maple upload software should not be installed unless loading an STM32F103 - Open Source STLINK upload and gdb server for Linux & Mac OS X:
https://github.com/texane/stlink
This uses the STM32F4 Discoveryʼs onboard Serial Wire Debug (SWD) JTAG hardware. - Open Source Arduino/Maple-like library for STM32F4 (WiP):
https://github.com/gbulmer/openstm32sw - .NET micro framework TinyCLR:
http://www.tinyclr.com/ - STM32F4 (WiP):
http://www.ghielectronics.com/catalog/product/353 - Eclipse IDE:
http://www.eclipse.org/downloads/ - NetBeans:
http://netbeans.org/ - CooCox:
http://www.coocox.org/
Contest Reports
Derek Hall and Peter Harrison
Outside the UK, there are three main contests that have international representation. They take place in Taiwan in September, Japan in November and The USA in February. This section of the day provided an opportunity to share some of the observations made at those contests. The Taiwan contest is a largely local event with a number of international invitees and it is a great honour to be included among those. Over the last couple of years a lot or work has been done in Taiwan on micromouse and entries over there have progressed rapidly from good to excellent. A number of the top ten mouse builders are now Taiwanese and I would not be at all surprised to see a Taiwanese mouse take the top title in the near future. In the USA is the APEC event. This year it was held at the Coronado Springs Conference Centre at Disneyworld in Florida. This was an interesting experience and provided another opportunity to see some of the world’s top mouse builders in action. The winner this year was Khiew Tzong Yong from Singapore but Cheng-Yu Huang from Taiwan came second, giving very close competition. The top event of all is arguably the All Japan Micromouse contest. Taking place for the last time in Tsukuba, this is a huge event with several hundred robots taking place in micromouse and line following events. The 2011 contest was notable for being the first time that a mouse managed to run the maze in under 4 seconds. This is a remarkable achievement, and brought with it a flurry of postings across the internet – even from people who didn’t seem to know what micromouse was. Whether it is even possible to get below three seconds I don’t know. If it can be done though, I certainly hope to be there to see it.
Slides: MINOS12h-Micromouse-Contest-Reports-Peter-Harrisona.pptx
An Unusual Wall Follower Sensor Design
Duncan Louttit
Duncan has been taking another look at how a robot in a micromouse maze can tell how far away the wall is. There are lots of schemes for this but I am pretty sure I have not seen it done this way before. The slides contain the drawings and describe it better than I can but the essence is this. The wall-floor junction represents a high contrast edge. A sensor can be arranged to that, with the mouse correctly positioned, the sensor is pointed directly at the boundary. As the mouse moves further away, the amount of reflected light is reduced because it is looking at the floor. As it moves closer, more light is reflected as the spot moves up the wall. So far, this is exactly like a standard reflector. The clever part is a second, reference emitter that points directly at the wall. This too will get more or less light as the mouse moves closer to or further from the wall. However, wall reflectivity will affect the readings. By comparing the response from both sensors, Duncan hopes that it will be possible to use the reference sensor to compensate for wall reflectivity while the primary sensor measures distance. After the problems caused by the variability in the walls on the MINOS maze, a way to reliably overcome reflectivity differences would be very welcome.
Slides: MINOS12j-McGuinn-sensors-Duncan-Louttit.ppt
Sleepless In Seattle
Harjit Singh
This year we were very fortunate to be able welcome Harjit Singh to MINOS for the first time. Why is this fortunate? Well, apart form the fact that he is a talented and experienced mouse builder, Harjit lives near Seattle on the west coast of the United States. Harjit was not able to fly over to join us but, thanks to the joys of Skype, he gave us a presentation about his sensors live from his home. Given the time difference, he had to be up rather early in the day – hence the title. The sensors used on Zeetah VI – Harjit’s current mouse – are essentially the same triangulation type used by Dave Otten on the MITEE series. As far as I know, nobody else uses these sensors even though they have some great potential benefits. Most notably, they have a greatly reduced sensitivity to wall reflections. While not immune, under normal circumstances, they are unlikely to need special calibration when used on different mazes. Harjit describes the sensor system itself along with its benefits and limitations and then goes on to describe an innovative way to perform the initial calibration. His technique would be equally useful for any sensor system and looks to be very reliable and, most importantly repeatable. If you are to compare sensors and walls, repeatability is critical. In brief, he uses an old line plotter to hold a wall while the mouse sits on the plotter bed. Since plotters commonly use serial communication and simple HPGL commands to drive them, a pair of serial connections from the PC to the plotter and the mouse allow the desktop computer to command movements of the wall and collect readings from the mouse. Thus the whole process of obtaining a distance response from a sensor can be automated and easily repeated with different wall surfaces and sensor arrangements.
Slides: MINOS12k-Zeetah-VI-Sensor-Harjit-Singh.pptx
Harjit was the last speaker of the day and I would like to thank all our speakers who took so much time to prepare and share their experience and provide us all with an excellent range of subjects.
Time for dinner…
