Unless you insist on throwing money at alkaline cells, you will need to be able to recharge your mouse batteries.
It is a good idea, at the design stage, to make provision for recharging. You might want to incorporate a charging socket on your mouse so that you can keep the batteries topped up or even give them a fast charge between runs. Even if you do this, it is probably sensible to make it easy to change the batteries in an emergency. There are plenty of mice with battery packs glued in. I would not be comfortable with that as cells can fail leaving you with a potentially serious rebuild at a critical time.
Both NiCd and NiMH cells can be recharged with the same equipment if you are prepared to wait. The standard way of recharging these cells is with a constant current charger. They must not be plugged in to a car battery charger.
Standard charging of these cells is for 16 hours at a current of C/10 where C is the battery capacity. Thus, for a 700mAh battery pack, you would charge at 70mA for 16 hours. This is enough to bring the battery from fully discharged to fully charged. Clearly, partly discharged batteries will need less time. For all common NiCd and NiMH batteries, this charge rate can be maintained indefinitely without harming the battery.
When they reach full charge, the current going into the battery will just generate heat so a fairly easy way to see if your battery is recharged is to feel it. If it is noticeably warm, it is probably ready.
Constant current chargers designed for NiCd (and NiMH) charging are easy to find and relatively cheap. They do, however, expect to be used for removable cells which might not suit your needs.
Ideally, the charger will provide an electronically regulated current to the battery pack. If you are a little less loving of your batteries, you can make a charger from a plug-in ‘wall wart’ power supply. First, find a plug in supply which can comfortably give a voltage that is at least a couple of volts higher than the battery terminal voltage (1.2V per cell) at the desired charging current. You can pick a current that is up to about C/4 without too much danger so long as you don’t leave the charger running too long. At C/4 the time for a full charge would be about 6 hours. Now add a series resistor between the power supply positive and the battery. This resistance will have to be calculated from:
R = (Vp – Vb) / Ic
where Vp is the power supply voltage under load, Vb is the battery terminal voltage and Ic is the charging current.
For example:
You have a 6 cell battery pack with a terminal voltage of 6 x 1.2V = 7.2 V and you want to charge it at 100mA. The power supply is rated at 9V at 100mA. The series resistor will be
R = (Vp – Vb) / Ic = (9 – 7.2) / 0.1 = 18 Ohm
Remember that the resistor will be generating heat. In this case about 180mW. Not too much but it would be sensible to choose a 1 Watt resistor to help ensure long life.
An LED placed in parallel with the current limiting resistor will provide a visual indication of charging. This can all be incorporated into the mouse electronics so that you can have the beast on charge while you are working with it. It would be sensible in this case to ensure that the charge rate is at least as great as the average current consumption of the mouse.
The circuit shown below is adapted from the Handyboard design. The bridge rectifier makes sure that there is no smoke if you get the wall-wart the wrong way round. R2 sets the charge current – you may want to mess with this. R1 and LED1 give a positive indication that the charger is on. D1 ensures that the battery can’t drive the charging circuit and allows more than one charging point if you should want it. This should be a rectifier diode like the 1N4001 rather than a signal diode.
While your PC is talking to your mouse, you will have a cable connected to the mouse. Why do use the method employed by the Handyboard design and have the RS232 drivers off-board along with a simple charger circuit so that you only need one cable to the mouse.
Fast charging
If you are impatient, or just in a hurry, you might want to use a fast charger. These are readily available from model shops and can detect when the battery has been fully charged. This is possible because, during charging, the battery voltage rises steadily. At the point of maximum charge, the voltage starts to go down by a small amount. These chargers can detect the voltage peak and switch from high charge current to trickle charge. Such chargers are often called peak chargers or peak detecting chargers. A light on the charger tells you when it is ready.
This kind of charger is generally capable of fully charging a NiCd pack in 30 minutes or less. However, most rechargeable cells are not designed for this kind of abuse and may well give reduced life. To put it another way, mind out that they don’t get too hot and let the smoke out.
NB – you cannot fast charge batteries in circuit. Without the peak detection, the charger will just keep on going and everything will get very hot. Similarly, you cannot have a diode in the fast charge circuit or the charger may not be able to detect the terminal voltage. They autodetect the number of cells when they start up.
Cells specially designed for fast charging are available from your local model shop and these should be used if you want to use a fast charger. Be sure to get a peak detecting charger and check that it will charge the number of cells you are using. Some chargers rely on a timer (bad) or can only handle a fixed number of cells (also bad).
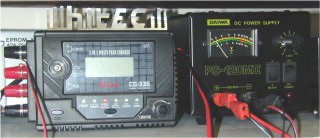
My charger is made by Hitec. It can charge from 4 to 24 cells at currents of several amps. It also has a voltage display for those of you who just have to know. This charger can also manage NiMH. Not all chargers can as the voltage peak from these cells is much more subtle than that available from NiCds. If in doubt check with the supplier and don’t just bash away with high charge currents.