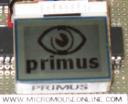
 This is a fairly big jump. With the LEDs and buttons tested, it is time to add the main graphical display, made from a Nokia cellphone display. Also, there is the main system timer event.
The simple user IO is working, and it is time to add a system timer. This will generate an interrupt every millisecond. In the final mouse a lot of work will be done in here – processing buttons, driving the LEDs, reading sensors and calculating drive signals for the motors.While that may seem a lot in a millisecond, the dsPIC used in primus can execute about 16,000 instructions in that tme and we should only need a small proportion of that time.Another function of the timer will be to maintain an internal clock so that the main program can time events and produce more reliable delays without holding up everything else. We shall continue to use the already present delay functions when it is acceptable for delays to be a bit rough, very short (less than 100us) or when the blocking behaviour is not going to cause any problems. The interrupts from the system clock will make the software delay functions run slow – possibly very slow so they can no longer be relied upon for anything but the simplest, non-demanding tasks.The system timer interrupts come from a 16 bit timer which will run continuously as long as the mouse is turned on. Since actually configuring the timer is pretty simple, this example will make use of the timer to debounce button presses, flash the LEDs and produce tones from the speaker. Trivial really.As with the other examples, the timer has its own source code module and header. Unlike the others, it is a relatively high-level module and must be able to call functions defined for the LEDs and buttons, and later for the sensors and motors.While we are at it, the nokia LCD is working. The test code should display a start up message followed by the Primus splash screen when you press a button. After that, pressing buttons will change the picture. This is just to show off the fact that it works. The LCD will become an essential tool in debugging and setting up so don’t leave it out.While the demo code displays pictures, these take up quite a bit of flash memory – about 760 bytes each – and they are not really needed. I like to put a splash screen up after a restart – just because I can. The images are a bit of a fiddle to create. I make a 2 colour image in PaintShop and save it as a RAW image file. A utility I have will read that file and convert it into the C definition you see in the source code.Remember that the display I have has 96×65 pixels. Try to get the right one if you are to avoid re-writing some of the driver code. Actually, the text stuff will work fine but you get shorter lines and fewer of them so take care.The complete project for MPLAB contains all the source code, the object files and som HTML documentation generated by Doxygen.
